Log in to your contenttypes site (or whatever you called it) as user 1. Follow along.
Let’s create a content type called Dog.
We’ll give it the fields:
- Name, e.g., Oscar
- Photo
- Breed, e.g., Labrador retriever
- Date of birth
- Weight
The content type
Go to Manage | Structure | Content type | Add content type.
Name the content type Dog. Type in a description.
There are four settings areas:
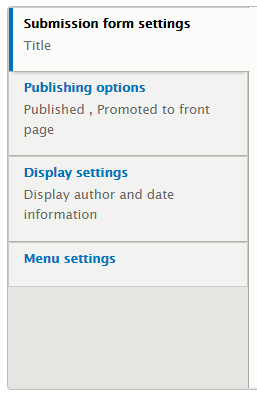
Title
Remember that each content type has to have a title field. But it doesn’t have to be called Title.

If this was a Book content type, calling the field Title would make sense. Books have titles. OK.
But we’re making a content type for dogs. Dogs don’t have titles. They have names. It would make more sense to call the title field Name, rather than Title. So:

OK, here’s something important. The difference between a field’s machine name and its label.
A machine name is Drupal’s internal name for a field. The machine name for a title field is always title.
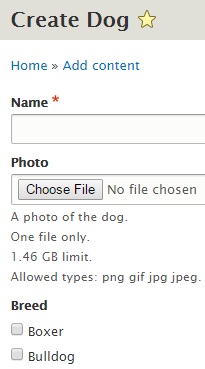
A label is the name it shows users. For example, when creating a dog instance, here is what the user sees:
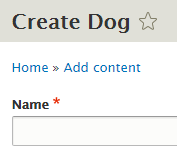
Drupal labels the field Name for the user. But the machine name of the field is title.
This matters when we get to making views. Views use machine names.
Give your title field the label Name.
Titles don’t have to be unique. You can have two dogs called Oscar, and three called Renata.
Publishing options
Remember that each node (instance of a content type) has a page. Usually, when someone creates a new node, you want it to be available immediately on the site. So, if someone creates a new dog node, it will show up in views of dogs.
Sometimes, you don’t want that. Maybe you want someone to review and approve the new dog node, before it shows up on the site. That’s what the Published option is for:
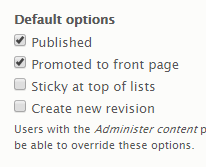
If a node is published, it shows up. If it isn’t, it won’t show up.
When you create a new content type (that’s what we’re doing now), you get to decide whether new nodes will be published, or not. That’s what we want, so we’ll leave Published checked. If you uncheck it, new dogs won’t be published. Someone will have to publish them before they show up on the site.
Promoted to front page and Sticky at top of lists don’t matter to us.
Create new revision is cool. Suppose you spend a lot of time getting a node juuuust right. The right photos, the right text; it’s all perfect. Then some bozo comes along and messes up the page. Deletes stuff you spent hours on. ARGH!
When you check Create new revision when creating a content type, when every time a node is updated, Drupal saves a copy of the node as it was before. You easily can retrieve the node as it was before Bozo Time.
Create new revision can be turned on and off for each node. Check it here (when you’re creating a new content type), and you’re setting the default for each new node of the type.
Turn it on. That means that every new dog will have revisions on by default.
Display settings

This does what it says. Almost always, this should be off. Make it so.
Menu settings
Do you want to list particular dogs in menus? Probably not. A view of dogs, yes, but not individual ones. Turn all of these off.
(If you change your mind, you can still create menu links to individual dog pages, as you did in your eMe.)
Save
Now save the content type.
Yippee! Time to mess with fields.
Fields
Here’s are the default fields, when you create a new content type:
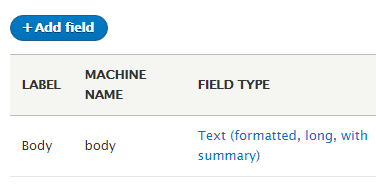
title isn’t listed. Content types always have a title field; Drupal doesn’t bother showing it.
Drupal automatically makes a field called Body when you make a new content type. If you don’t need it, get rid of it.
Kill body (in the library, with a pipe)
The Body field is what you’ve been typing into when you create your eMe pages. Look at the field type: Text (formatted, long, with summary). This is what one of those fields looks like:
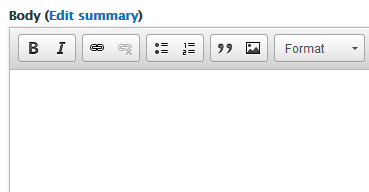
It should look familiar. You’ve been typing into many body fields.
We don’t need a Body field for Dog. Get rid of it. You can figure out how.
Add photo
Click on Add field. You see:
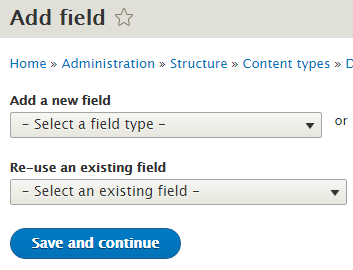
Drupal lets you reuse fields that already exist. Saves time.
We want a photo. The Article content type already has a field we can use. Wait, what? You didn’t create the Article content type!
Drupal created the Article content type automatically, when you installed the software.
The Article content type has a field with the machine name field_image, and the label Image. Re-use the field, but change its label to Photo.
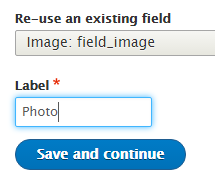
The next screen has a bunch of settings. Add some help text. Now scroll down the page, but don’t change anything. Some of the settings already have values. Where did they come from? From field_image, when it was created for the Article content type.
Woohoo for re-use! It saves us work.
Add breed
Let’s think this through. When someone creates a new Dog instance, we want to give them a list of breeds, like this:
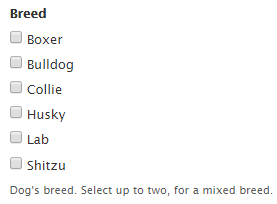
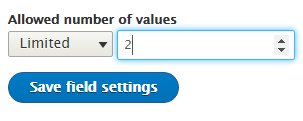
Mixed breeds are common, so let’s allow users to choose up to two breeds. So Lab Husky is OK, but Lab Husky Collie Boxer Bulldog is too many.
OK, let’s set up this field. Click Add field again. We’ll need a new field this time. Make the field type List (text). Set the label to Breed. Notice that Drupal creates a new machine name for you.
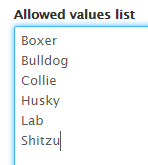
Enter a list of breeds, whatever you like. Here’s what I did:
Now tell Drupal to allow two:
The field is not required, so users don’t have to enter a breed when creating a Dog node.
(When you create a new dog node, you may get a dropdown for breed, rather than checkboxes. We’ll fix that later.)
Add date of birth
Add a date field with the label “Date of birth”. Make it date only, with one value. Add some help text.
Add weight
Add a field for weight. Select Number (integer) as the data type. (Integers are whole numbers.) Add some help text. Give sensible maximum and minimum values. Make the suffix “lbs”.
Multiple displays
Look above the field list, and you’ll see some tabs:

The Edit tab shows basic settings for the content type, like its name. They were the first things you told Drupal about when you created the content type. The Manage fields tab lets you create fields, as you just did. These fields are stored in your Drupal site’s database. But what are the other two tabs?
Say you create a node for Oscar, a lab. There are two ways people can see Oscar’s node. First, there’s the form someone uses when creating or editing the node.
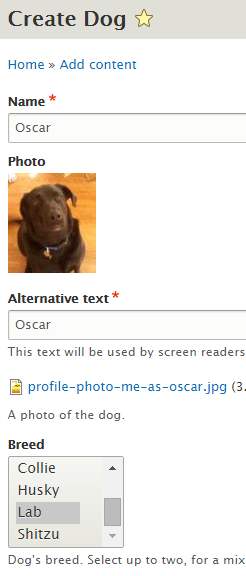
Second, there’s the page display, when they look at the node:
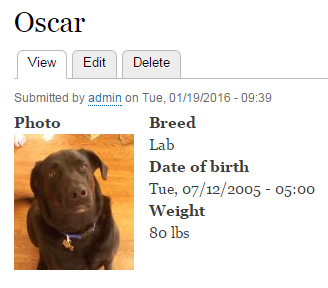
Drupal gives you control over both. (Drupal can create many display types for the same node, but let’s not worry about that now.)
Let’s change the input form. Right now, breeds are shown in a list widget. I’d rather have checkboxes, so it’s easier to see both breeds, if there are two:
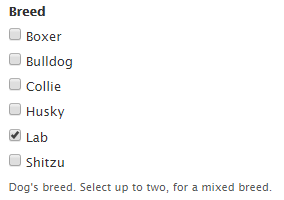
Here are those tabs again:

Click on Manage form display. Then change Breeds to checkboxes:
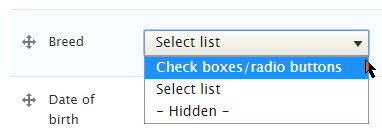
Now the dog form will use the right widget.
The Manage display tab lets you control how the page display looks to users. This is what I have now:
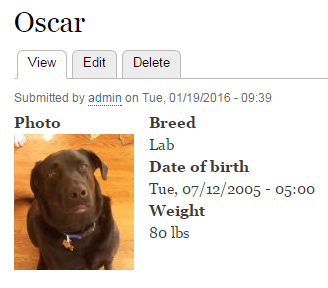
The format for date of birth doesn’t make sense. We’d rather have:
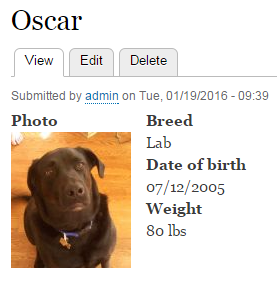
You can make that change on the Manage display tab (use a custom format: m/d/Y).
Add Dog nodes
Create some Dog content. Enter a name, photo, etc. Pixabay.com has some good dog photos.
Add four more dogs. Try different things with breed, weight, and the other fields. Get a feel for what it’s like to enter data.
Use the Manage display tab to change the way photos are displayed. Try the thumbnail option.
For tech humans: Machine names and labels
(You can skip this section.)
Go to the Create Dog form. Look at the HTML source. Ctrl+U in most browsers.
Search for exactly this: label for="edit-title
You’ll see this HTML (some omitted):
<label ...>Name</label>
<input ... name="title[0][value]" ... />
The <input> tag creates the widget for the user to type in. It’s name is title (and some other stuff). However, the <label> tag shows Name to the user. This is how Drupal do.
Making fake dogs
We need some dog data for the next lesson. You could type in a bunch of data yourself, but that takes time. Let’s tell Drupal to make fake data for us.
For that, we’ll use Devel. Install the latest version for Drupal 8. It adds several modules. Enable Devel generate.
Now go to Configuration | Development | Generate content. Tell it to generate 50 dogs. You can leave the other settings at their defaults.
Go to Content, and you’ll see many dogs. Have a look at some.
Permissions
Go to the permissions page, and scroll down to the Node section. You’ll see new permissions for the Dog content type:
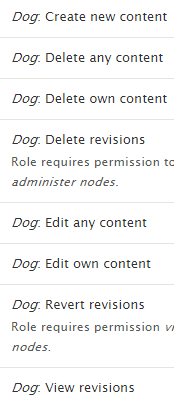
Every node has an owner, usually the person who created it. Notice that there are separate permissions for working on your own nodes, and working on all nodes.
This comes in handy. Suppose you’re making an IS for recipes that use Vegemite (it’s a yummy food). You make a content type called Recipe, and two roles: Contributor, and Editor. Contributors go to the site, log in, create a Recipe node (probably by going to /node/add/recipe ), and type in their recipe. Drupal gives that user ownership of the new node. If Contributors have “Recipe: Edit own content” permission, but not “Recipe: edit any content” permission, they’ll only be able to update their own recipes.
You give Editors “Recipe: edit any content”. They can do what they like with recipes.
Exercises
contenttypes Drupal, or whatever you called it. Add the fields:
- Name, e.g., Oscar
- Photo
- Breed, e.g., Labrador retriever
- Date of birth
- Weight
Breed should be a text list, with check boxes. For date of birth, use the custom format m/d/Y. Use an integer for weight, with the suffice “lbs”.
Use Devel to generate data for 20 dogs. Limit the node title to one word. (The data won’t make any sense. That’s OK.)
Submit the URL of your site, along with login credentials for user 1.(If you were logged in as a student, you could submit an exercise solution, and get some feedback.)
contenttypes Drupal (or whatever you called it), make a content type called Person, with the following fields:
- Last name (use the
titlefield) - First name (plain text field) (Limit to 20 characters, otherwise Devel goes wiggy with it.)
- Photo
- Date of birth
- Gender (a text list, with options male and female)
- Notes (a formatted long text field) (You can use
bodyfor this, if you want. Change the label to Notes.)
Use Devel to generate data for 20 people. Limit the node title to one word. (The data won’t make any sense. That’s OK.)
Submit the URL of your site, and login credentials for user 1.(If you were logged in as a student, you could submit an exercise solution, and get some feedback.)
Summary
We made a content type called Dog, with fields for name, photo, breed, date of birth, and weight. We used Devel to generate some fake dogs.
