Let’s play with the Drupal instance we just created. Go to its front page, at http://fastturtle.calmcamel.net, or whatever it is.
Log in
The first task is to log in as admin. When you installed Drupal, it created an account with the username and password that were on the config screen:
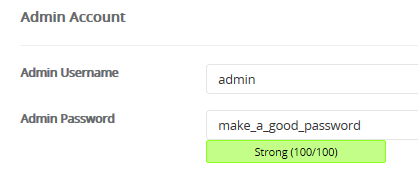
That’s the account you’ll use to login.
Normally, you use this account just to configure and and administer your site. You make another account to create content. We’ll do that later. For now, let’s use the admin account.
You should see a login link on your new site’s front page. Click it.
Look at the URL of the login page:
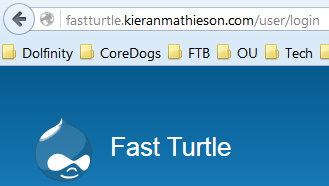
The login page is just a Web page with a URL, like any other. You get to the login page by clicking a link, or by typing the URL.
Every Drupal administration page has a URL.
Log in with the admin credentials. You’ll see:

Several things to notice. First, look at the URL: http://fastturtle.calmcamel.net/user/1. Again, every page has a URL. You could get to the page by typing it in a browser (although if you don’t have permission to look at a page, Drupal won’t show it to you).
Second, there’s more stuff on the page then there was. The administration (or admin) menu is at the top of the page.
Tell Drupal you want to make a page
Let’s make a front page, also called a home page. Click the Content link in the admin menu, then Add content. Click Basic page. You’ll see:
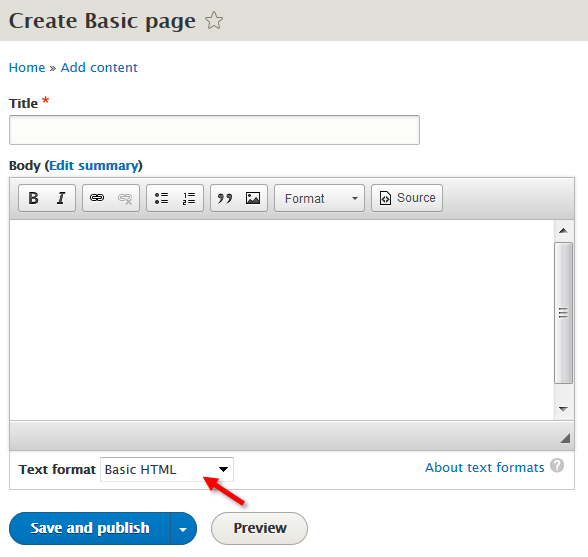
Type “Welcome” in the title, and something in the body. Maybe a joke. The editor works as you think it does. Bold, italics, etc.
Look at the Text format field. You can choose Basic HTML, Restricted HTML, or Full HTML. HTML is the language Web pages are written in. (Click the Source button if you want to see the HTML you’re creating.) See what happens when you change the text format.
Add pictures
Click the image button in the editor’s toolbar. You’ll see:
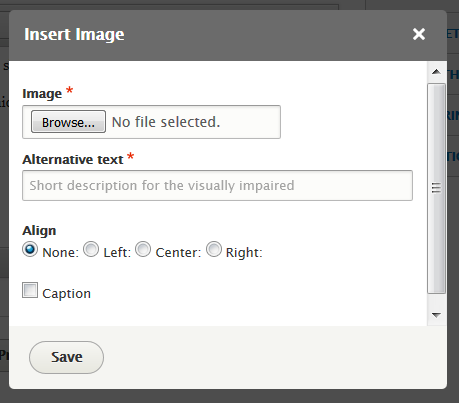
Images aren’t part of the HTML of a Web page. They’re stored in separate files. To put an image on a page, you have an image file on your computer, and select it with the Browse... button. When you click Save, Drupal will upload the image to your server, and put a reference to it on the page you’re editing. So while it looks like the image is part of the page, it’s really a separate file that is referenced by the page.
There are many different image formats. Drupal uses the Big Three: PNG, JPG, and GIF. If you want to use an image that’s in another format, you need to save it in one of the Big Three first.
OK, choose an image on your computer. If you don’t have one at hand, right-click on this one and save it:

The image is from Pixabay, a good source of free images.
Notice the Alternative text field:

Always fill that in, for two reasons:
- It describes the image for visually impaired people
- Search engines like Google use the text, so your page might show up when people search for a related word
Save the page. Actually, the button says Save and publish. Pages that are “unpublished” are on the site, but not visible to normal users. This lets authors work on content, and only publish it when they’re ready.
Look at the URL of the page. Here’s mine:
![]()
/node/1? The URL doesn’t tell you what the page is about.


http://fastturtle.calmcamel.net
… rather than the full URL…
http://fastturtle.calmcamel.net/node/1
For other pages, a poor URL is a problem. Google gives a higher ranking to pages where the URL matches the content of the page. For example, if you had a page about a giraffe with a sore throat, a good URL would be:
http://fastturtle.calmcamel.net/giraffe-with-sore-throat
That page would rank higher for searches about giraffes than a page with the URL:
http://fastturtle.calmcamel.net/node/138
Match the URL to the topic of the page.
We’ll see how to fix the URL in a moment.Front (home) pages
Let’s make the page we just created into the front page. We need to tell Drupal what the URL of the front page is, and it will handle the rest.
In the admin menu, click Configuration, then System, then Site information. Fill in the front page URL. Save. Click the home link, and you’ll see the page you just created.
Menu items for page
Make another page. Remember, that’s Content in the admin menu, the Add content, then Basic page. I gave the title “Dogs are the best!” and some junk text for the body. You can do what you like. But don’t click Save yet. (If you already did, click Edit.)
On the right of the edit screen, you’ll see some extra settings:

Click on Menu settings. Here’s how I filled mine in:
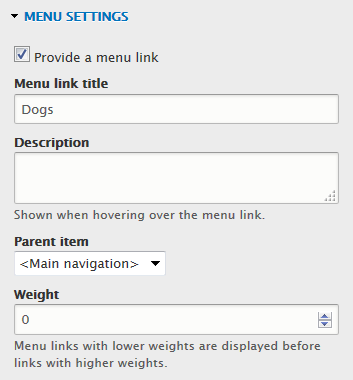
This tells Drupal to make a link in the main menu, with the text Dogs. It will link to the page I’m working on.
Save the page. Here’s what mine looked like:
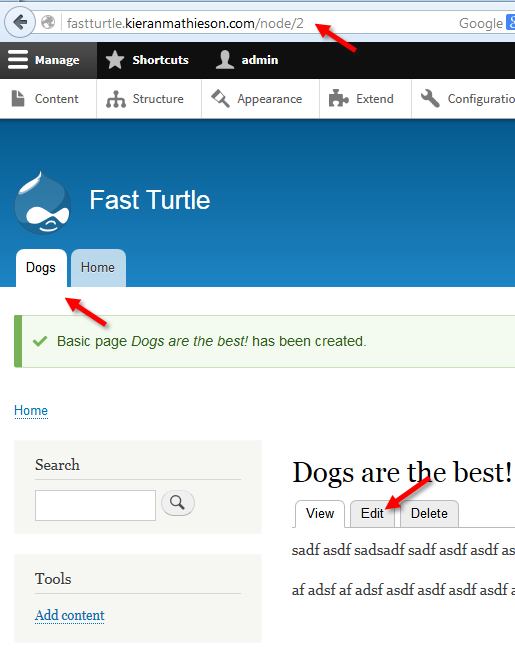
There are two problems. First, the URL. /node/2 isn’t good for SEO. Second, the menu items are in the wrong order. We’ll deal with the menu in a later lesson. Let’s fix the URL. Click the Edit link.
Use an SEO-friendly path
SEO stands for search engine optimization. That’s what marketing people do to get their pages to show higher in search rankings.
Here are those page settings again:

Open up the URL settings, and give your page a good URL. Here’s what I did:
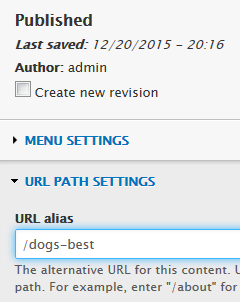
Save. Check the URL. Ah, much better!
List all your pages
You can see a list of all the site’s pages at /admin/content. Get there by clicking on Content in the admin menu.
Exercise
- Add some text and at least two images
- Make a link to the page on the main menu
- Give the page an SEO-friendly URL
(If you were logged in as a student, you could submit an exercise solution, and get some feedback.)
Summary
You learned how to log in, and make pages. Every admin page has a URL. You can get to the page by typing in the URL, as well as clicking links.
You can give pages menu items, and URLs. Meaningful URLs help with SEO.
