Content types make Drupal useful for business. They let you store data about customers, products, whatevs. But you need to get that data out again. That’s what views are for.
Views are lists, usually of nodes (recall that a node is an instance of a content type). If you have a content type of Dog, and you make some Dog nodes, you can create a view that lists the Dog nodes.
That’s how the student org site, http://gamerz.cybercour.se/, works. Take a look at the Projects page. That’s a view of Project nodes. Now look at Members. That’s a view of Member nodes. Each list was created by a view.
Drupal updates views automatically, when the nodes change. Nobody has to keep the lists up-to-date. Drupal handles it.
A simple view
Let’s make a view of the names, date of birth, and weight of the dogs. It will look like this:
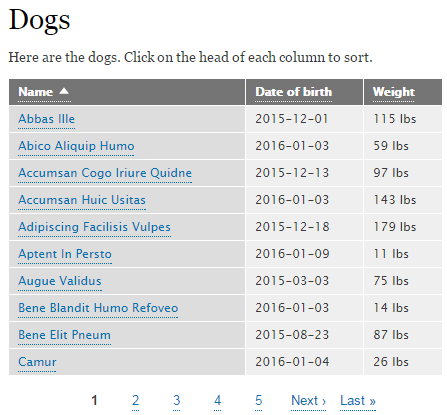
Follow along on cowbook.
Start with Structure | Views | Add new view. Type in a name and description for the view. I called mine Dogs.
Now tell Drupal what data you want on the view:

Show nodes of the Dog content type, sorted by Title.
Now tell Drupal you want to Create a page for the view. Click the checkbox, and some more widgets will appear. Fill them in like this:
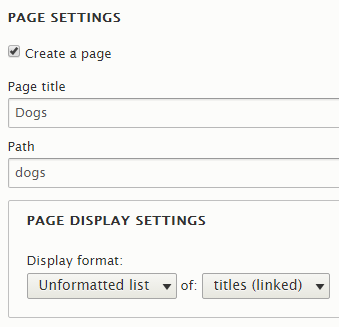
Path is the URL of the view. This one will be at http://yoursite.com/dogs.
The view will be a simple list of nodes to start with. We’ll change it to a table later. Each item in the list will show the title of the node, linked to the node’s page.
You have lots of dogs. Should the view show them all at once, or in groups? That’s what these settings are about:

The view will show ten items at a time, with a pager. The pager lets users go backward and forward through the list, using one of these things:
![]()
Check Create a menu link, and make it like this:

This will put a link for the view in the main menu.
Now click Save. Drupal will make the view, and then show you a scary page showing all the ways you can customize the view.

OK. Open a new tab, and look at your Web site. You should see a new link on the main menu, for the view you just made. Try it. You should see something like:
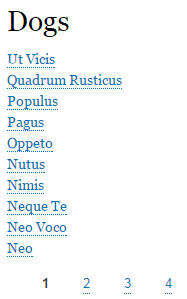
Your dog names will be different, because Devel (the module you used to generate the data) uses random words.
OK. Let’s go back to the scary views page, and see what’s what.
Here’s the first part of the view’s settings:
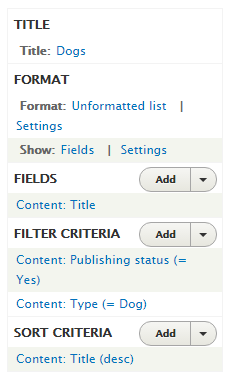
Let’s see if we can match up the settings with the result. First, there’s the title.
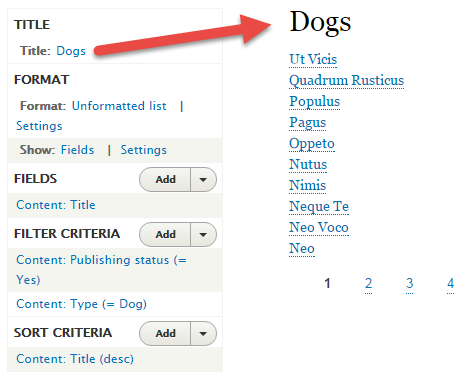
OK, clear enough.
Now the format. This is how Drupal displays the nodes. Could be a table, a grid, a slideshow, other choices. This view is just an unformatted list.
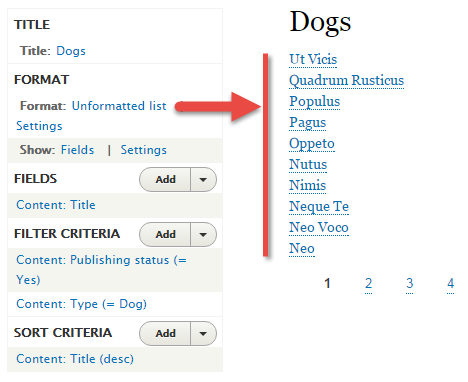
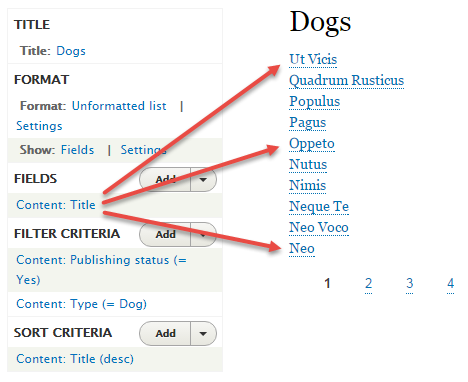
Next, the fields to show. Right now, the view is just showing the title for each node. We’ll add more fields later.
Now, the filter criteria. The filter says which nodes to show. Think of the filter as a wire mesh.

Only the nodes that match the filter criteria make it through.
Here are the criteria:
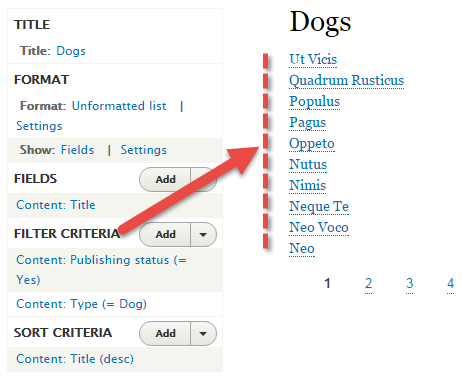
First, only published nodes will be shown. You can hide nodes without deleting them by unpublishing them. Useful for managing content. For example, if a node has an error (e.g., a dog’s breed is wrong), unpublish the node, fix it, then publish it again.


Only show nodes of the Dog content type. Let’s say you had another content type for birds. You could show dog and bird data in the same view.


The last thing is the sort criteria:
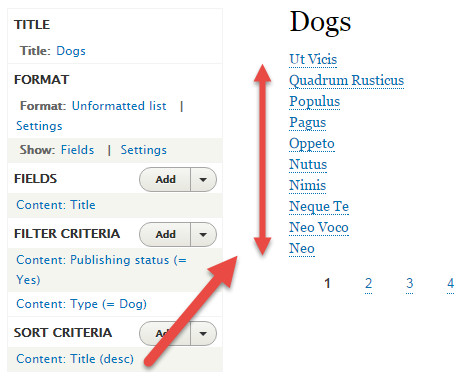
The nodes are sorted by title, descending. Drupal defaults to descending when creating new views. I don’t know why.
Adding fields
Let’s add date of birth and weight to the view. Click Add next the Fields. You’ll see a bazillion things that Drupal can show. Start typing the field name into the search widget, until you find what you’re looking for:
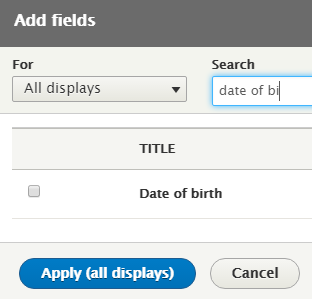
When you find it, hit it’s checkbox, and Apply.
Next, Drupal asks how you want to show the field. Do this:
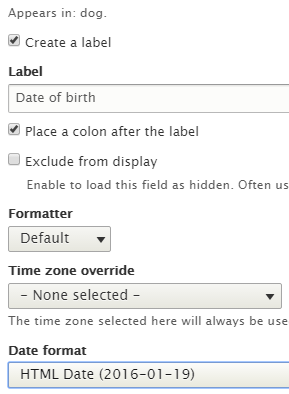
Save the field settings. Now scroll down below the view settings, to the preview. You’ll see title and date of birth for each field. W00t!
Add the weight field.
Change the sort order to ascending.
Table format
Change the format from an Unformatted list to a table. Click on “Unformatted list” to do that.
Drupal will ask you how to show the table. Choose these settings:
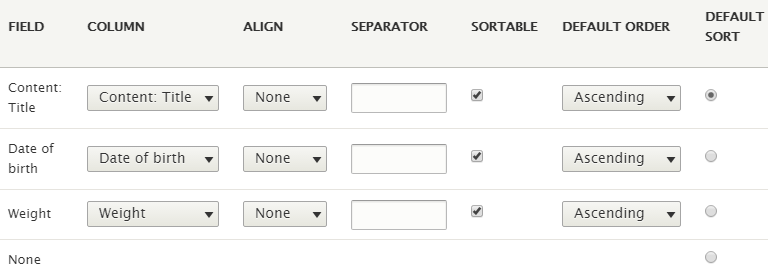
Click Apply, then Save the view. Switch to the tab that’s showing the view, and refresh the page. You’ll see something like:
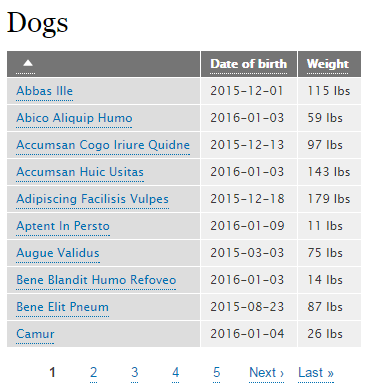
There are three fields. Yay!
The data is sorted ascending by title. Yipee!
The little arrow on the first column tells you that you can change the sorting. Click it. Now click on the other columns. You can sort by them, too! A-wooo-ga! A-wooo-ga!
BTW, this feature is called click sorting.


title field for the dog’s name, but giving it the label “Name”.
The second column of settings
On the scary view settings page, there’s a second column of settings.
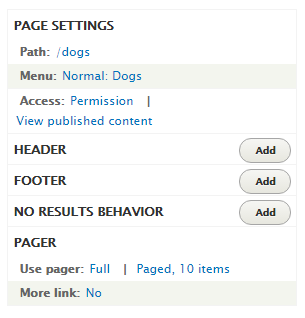
You can change the URL (path) of the view. You can remove its menu entry, or move it to a different menu.
Access is useful. The default is that anyone with the permission View published content can see the view. Usually, everyone has that permission, including Anonymous.
Maybe you only want some people to see a view. For example, if you’re using Drupal for a course (like this one), you might want instructors to be able to see how many exercises every student has completed. However, students can only see their own data. How to do that? Create a role called Instructor and another called Student. Make a view showing the number of exercises that each student has completed. Set the view’s Access, so that only users with the role Instructor can see the view.
Here’s the settings again:

Header and footer let you add content above and below the view. Often you add a header to explain what people are seeing on the page. Try it. Add a Header. Scroll down the list of header types (there’s a lot), and choose Unfiltered text. Copy and paste this:
Here are the dogs. Click on the head of each column to sort.
Save, and check out the view. Hooray!
Now, what if all the Dog nodes are unpublished? You get no list, because the filter only shows published dog nodes. People might think your site is broken.
That’s what No results behavior is for. You can add a message to show when the view has no nodes.
At the bottom, you can control the pager. Instead of 10 dogs per screen, you could have 20, or whatever number you wanted. You could turn off the pager, so that all records show. Whatevs.
You should have at least a fuzzy idea of how to make views. There’s more to it, but that’s enough for now. You’ll see more later.
Exercises
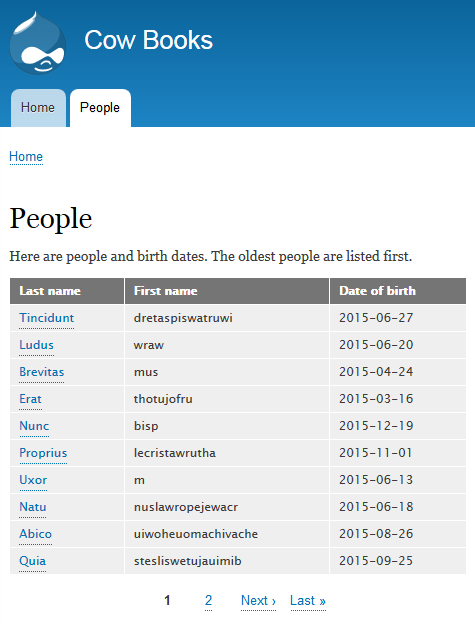
Make the columns in the right order from left to right. Only show published people records. Use a pager showing 10 nodes at once. Give the view an entry in the main menu. Add text to the header like in the example, and make sure the rows are in the stated order.
Submit the URL of your site, plus the login credentials of user 1.(If you were logged in as a student, you could submit an exercise solution, and get some feedback.)
Make a grid that shows people’s last names and photos, like this:

- Only show published Person nodes.
- Make a grid of three rows and three columns per page.
- Make the photos thumbnails.
- Link the names and images to their nodes.
- Sort by last name, vertically.
- Make a menu entry for the view.
We haven’t talked about some of these things. Hunt around in the view’s settings.
Submit the URL of the view, and login credentials for user 1.(If you were logged in as a student, you could submit an exercise solution, and get some feedback.)
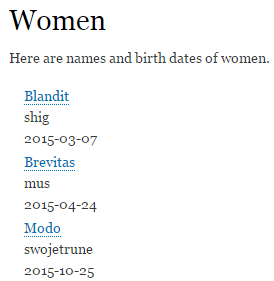
- An unformatted list
- Add text to the header (see example)
- List published Person nodes. Only women, of course.
- Show last name, first name, and birth date
- Sort by last name
- No pager
- Link last name to the node
- Make an entry for the view in the main menu
- Make to view available only to users with the Administrator role
(If you were logged in as a student, you could submit an exercise solution, and get some feedback.)
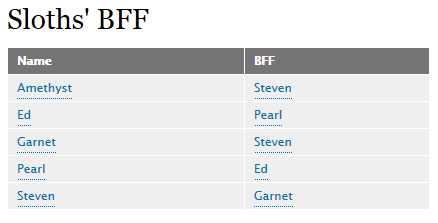
In a table, sorted by sloth name. Names of sloths and their BFFs are links.
Submit the URL of the page, and login credentials for user 1.(If you were logged in as a student, you could submit an exercise solution, and get some feedback.)
Summary
Views are lists, usually of nodes. Drupal updates views automatically, when the nodes change. You learned how to create a simple view.
